
You know the daily frustration. You open your closet, and clothes spill out. Nothing fits right. Standard wardrobes waste valuable space and ignore your habits. A custom design wardrobes project changes everything. You reclaim your room and express your personal style through thoughtful wardrobe design. A custom wardrobe fits your exact measurements, your clothing types, and your daily routine. Whether you choose a built-in wardrobe with sliding doors or a freestanding piece, the sliding panels save space while the sliding action feels smooth. This guide walks you through assessing your needs, selecting materials, and planning interiors. You learn how to measure, compare options, and set a budget. By the end, you confidently start your project with clarity and ease.
Key Takeaways
- Start your wardrobe project by counting your clothes and measuring your room.
- Choose sliding doors to save space or hinged doors for full access.
- Select plywood for humid climates to ensure long-lasting durability.
- Plan a balanced interior with hanging space, shelves, and drawers.
- Consider modular wardrobes for flexibility and custom wardrobes for a perfect fit.
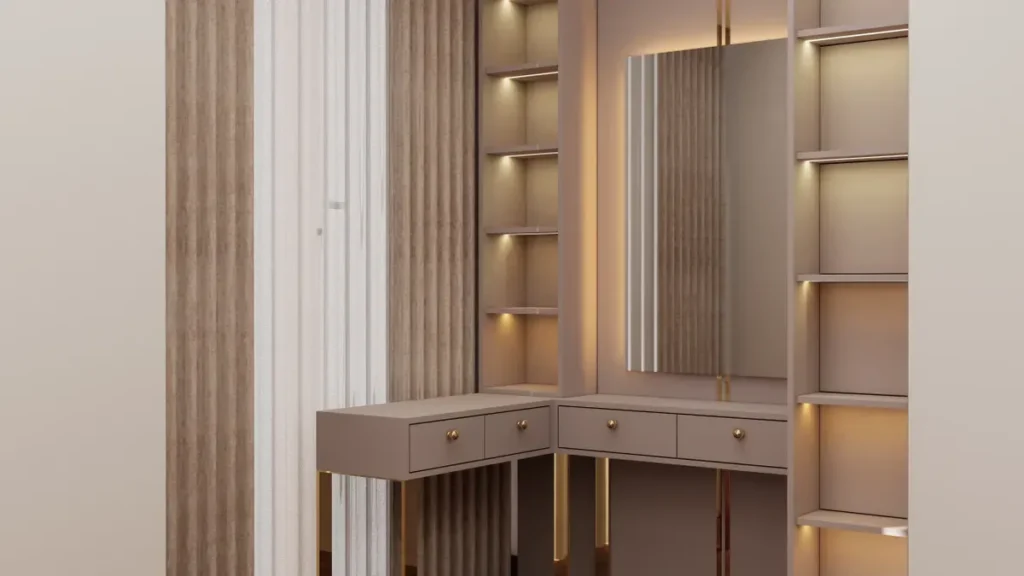
Assess Your Storage Needs and Space
Every successful custom wardrobe begins with a thorough assessment of what you own and where you plan to place it. This foundational step determines everything that follows in your wardrobe planning journey. Skipping this phase leads to wasted space, poor organization, and costly adjustments later. You need a clear picture of your belongings and your room before you explore any design options.
Inventory Your Belongings and Identify User Habits
Start by emptying your current closet completely. Lay everything out on your bed or floor so you can see the full volume of your clothing. Categorize each item by type: dresses, coats, shirts, pants, folded sweaters, shoes, and accessories. Count how many pieces fall into each category. Pay special attention to your longest garments, such as floor-length dresses or long coats. Many people forget to measure these pieces, which leads to rods installed too low or too high, causing overcrowding or wasted vertical space.
You also need to separate long hanging items from short ones. Dresses and coats require more vertical clearance than shirts and jackets. This separation helps you plan rod placement accurately. Do not forget to count shoes, handbags, and accessories before allocating shelving. Skipping this evaluation leads to clutter and poor space usage. Consider who uses the wardrobe and how. A shared wardrobe needs zones for each person. Children need lower rods and accessible shelves. Your daily routine matters too. Place frequently worn items at eye level for easy access.
Measure Your Room and Identify Architectural Constraints
Accurate measurements form the backbone of any fitted wardrobe project. You need the ceiling height, wall length, and room depth. Use a metal tape measure and record every dimension in centimeters. Measure at multiple points along each wall because floors and ceilings often slope slightly. Many people rush this process and assume the space is perfectly square. If your space is not square, a professional can compensate, but DIYers often end up with gaps or crooked drawers.
Note every obstruction in the room. Windows, doors, electrical outlets, light switches, and baseboard heaters all affect where your wardrobe can sit. Check whether you plan for floor to ceiling wardrobes, which maximize storage but require precise ceiling measurements. Also consider door clearance. Hinged doors need about 60 to 90 centimeters of clearance in front to swing open without colliding with furniture. Sliding doors solve this problem in tight spaces, but they require track space at the top and bottom. Sliding mechanisms also reduce accessible width slightly since only one side opens at a time.
A common mistake is failing to double-check your measurements. Always re-measure and account for irregularities before you finalize any wardrobe planning documents.
Common measuring errors include:
- Underestimating the importance of accurate measurements, which leads to doors that do not fit or wasted materials
- Failing to measure the room layout, including door and window placements, ceiling height, and uneven floors
- Not double-checking measurements before ordering your custom wardrobe
Take photos of the room from multiple angles. Note the direction of natural light and any radiators or air conditioning units. These details matter during the design phase. With complete measurements and a full inventory, you can move forward confidently to explore wardrobe types and door styles.
Explore Custom Design Wardrobes: Types and Door Styles
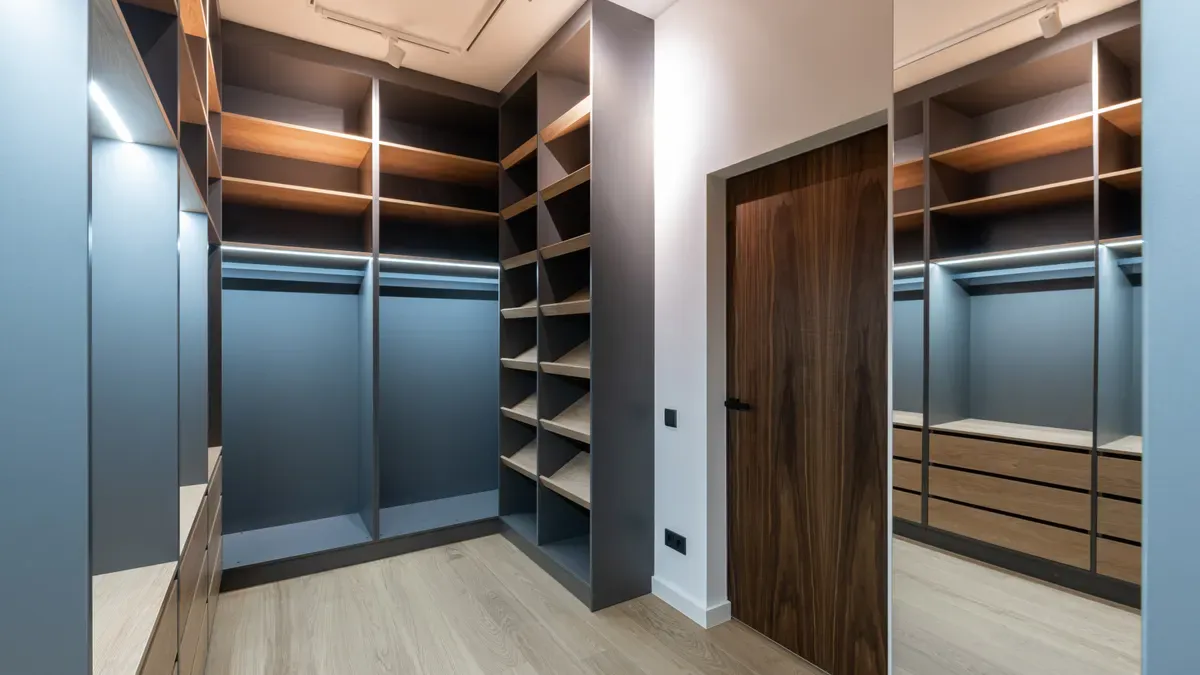
Now you know your space and your storage needs. You can explore the main types of wardrobes available. The door style you choose defines both the look and the functionality of the unit. For most room layouts, you have two primary options: sliding doors and hinged doors. You can also consider a walk-in closet, which removes doors entirely and creates a dedicated dressing space. A walk-in requires more floor area and careful lighting design. For most bedrooms, however, a built-in wardrobe with either sliding or hinged doors remains the practical choice. These two types of wardrobes each offer distinct advantages.
Sliding Doors for Space Efficiency and Modern Look
Sliding doors glide parallel to the wardrobe body. They require zero clearance in front of the unit. This feature makes them ideal for narrow rooms. You save the full 50 to 60 centimeters of floor space that hinged doors would need. In a small bedroom, that difference transforms the layout. You can place a bed or a desk right next to the wardrobe without blocking the doors. Sliding doors keep the walking path completely open.
Sliding wardrobes also offer a clean, modern aesthetic. The panels create a continuous surface across the wall. You can choose mirrored panels to make the room feel larger. Sliding wardrobes work well in floor to ceiling wardrobes, where the vertical lines emphasize height. The sliding mechanism requires precise installation, but you gain a seamless look. Sliding wardrobes remain popular in modern homes for their space-saving benefits.
You do sacrifice some accessibility with sliding design. Only one half of the wardrobe opens at a time. You need to plan your internal layout around this limitation. Place frequently used items in the center sections that you can access from either side. The sliding action feels smooth and quiet with quality hardware.
Hinged Doors for Full Access and Classic Appeal
Hinged doors swing open to reveal the entire interior. You see everything at once. This design works best in rooms with enough clearance. You need at least 50 to 60 centimeters of unobstructed flooring in front of the wardrobe. If you have the space, hinged doors offer unmatched convenience. You can access any corner without sliding panels.
The classic look of hinged doors suits traditional and transitional styles. You can choose paneled doors, shaker styles, or full-height slabs. Hinged doors also allow you to add decorative hardware. The swing of the door becomes part of the room experience.
For fitted wardrobes in larger rooms, hinged doors remain a popular choice. A custom wardrobe with hinged doors integrates seamlessly into the wall. The doors close flush against the frame. You get a built-in appearance that feels timeless.
Both types of wardrobes serve different needs. Your room dimensions and your daily habits guide your choice. A professional wardrobe design can help you balance these factors. Understanding the types of wardrobes available ensures you make the right decision.
Select Durable Materials for Your Custom Wardrobe
The materials you choose determine how long your wardrobe lasts and how well it withstands daily use. Quality matters more than appearance alone. A beautiful wardrobe that warps or delaminates within a few years costs you more in the long run. HenLeap Home uses high-quality materials and reinforced cabinet construction to ensure longevity. You should understand the differences between core materials before you make your selection.
Compare Core Materials: Plywood, MDF, and Particle Board
Three core materials dominate the custom wardrobe market. Each offers different strengths and weaknesses. Your choice impacts durability, moisture resistance, and cost.
| Material | Strength | Moisture Resistance | Best Use |
|---|---|---|---|
| Plywood | High structural strength | Excellent, especially marine grade | Humid climates, structural panels |
| MDF | Good screw holding, smooth surface | Moderate (MR grade only) | Indoor, climate-controlled spaces |
| Particle Board | Lower strength, prone to edge damage | Poor | Budget projects, dry rooms |
Plywood consists of thin wood layers glued together in cross-grain patterns. This construction gives it exceptional strength and dimensional stability. Plywood resists warping better than other options. It handles heavy loads without sagging. For a built-in wardrobe in a humid climate, plywood stands as the superior choice. The cross-laminated structure prevents moisture from distorting the panels.
MDF, or medium-density fiberboard, offers a smooth, uniform surface. It takes paint beautifully and cuts cleanly without splintering. MDF costs less than plywood. However, moisture poses a serious risk. In controlled, air-conditioned environments, MDF can last 10-15 years. In humid conditions without air conditioning, problems may appear within 3-5 years. Complete edge sealing extends MDF’s life, but you must maintain that seal carefully.
Particle board represents the budget option. Manufacturers compress wood chips and sawdust with adhesive. This material costs the least but offers the lowest durability. Particle board swells when exposed to moisture. Its edges chip easily during installation. You should reserve particle board for temporary solutions or rooms with very low humidity.
For wardrobe design in humid regions, plywood remains the recommended material. The evidence clearly shows that plywood offers better long-term durability than MDF in non-air-conditioned rooms within humid climates. You protect your investment by choosing plywood for these challenging environments.
Evaluate Finishes: Laminate, Veneer, and PU Paint
The finish protects your wardrobe’s core material and defines its appearance. You have three primary options to consider.
Laminate finishes consist of a decorative paper layer bonded to the core under heat and pressure. This finish resists scratches, stains, and fading. Laminate offers hundreds of colors and patterns. It cleans easily with a damp cloth. The cost remains moderate. For busy households, laminate provides practical durability.
Wood veneer applies a thin slice of real wood over the core material. This finish delivers the warmth and grain of natural wood at a lower cost than solid timber. Veneer requires more care than laminate. You must avoid prolonged moisture exposure. Scratches can penetrate the thin wood layer. However, veneer adds genuine elegance to your custom design wardrobes.
PU paint, or polyurethane paint, creates a seamless, lacquered surface. This finish offers excellent durability and moisture protection. PU paint resists yellowing and maintains its color over time. You can achieve high-gloss or matte appearances. The application process requires skilled craftsmen. This finish costs more but delivers a premium look.
Your finish choice should match your lifestyle. Families with young children benefit from laminate’s scratch resistance. Design enthusiasts appreciate veneer’s natural beauty. Homeowners seeking a modern, seamless aesthetic choose PU paint. HenLeap Home’s professional design team can help you match finishes to your core materials. The right combination ensures your wardrobe performs beautifully for decades.
Plan the Internal Configuration
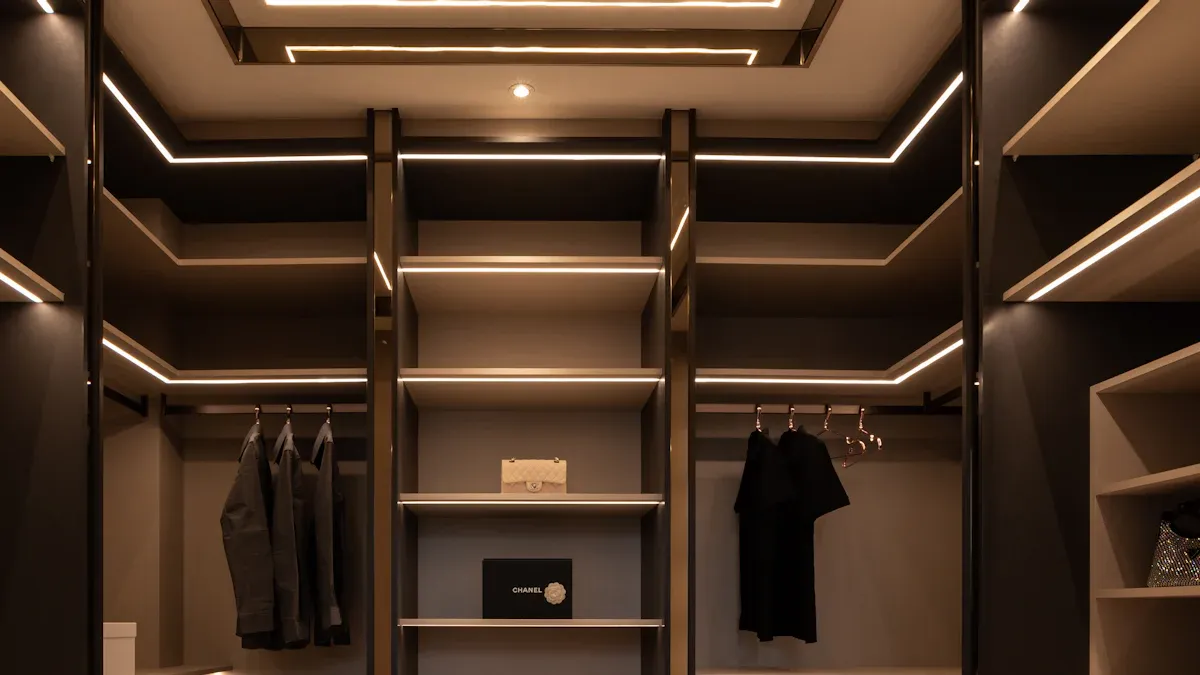
The internal layout determines how well your wardrobe serves you daily. You can choose beautiful doors and premium materials, but poor internal planning still creates frustration. Think about your daily routine. You wake up, you need clothes quickly. You want everything visible and reachable. A thoughtful internal configuration turns your wardrobe into an efficient system rather than a storage box.
Balance Hanging Space, Shelving, and Drawers
Start with your clothing inventory from the first section. Divide your items into three categories: long hanging, short hanging, and folded. Long hanging items include dresses, long coats, and maxi skirts. These pieces need roughly 120 to 150 centimeters of vertical clearance. Short hanging items like shirts, blouses, and jackets require about 90 to 100 centimeters. Folded items such as sweaters, jeans, and t-shirts need shelving or drawers instead of hanging rods.
Allocate your hanging rods based on your actual counts. If you own twenty shirts and five dresses, you need more short-hanging space. Many people make the mistake of installing equal amounts of each. That approach wastes valuable space. You can also install double hanging rods in one section. This configuration doubles your short-hanging capacity within the same footprint. A lower rod sits about 90 centimeters from the floor, and an upper rod sits about 180 centimeters high. You reach both easily without a step stool.
Shelving suits items you cannot hang. Folded sweaters stack neatly on shelves. You can see each color and pattern at a glance. Adjustable shelves offer flexibility. You can move them as your wardrobe changes over time. Fixed shelves cost less but limit your options. Choose adjustable shelving for most of your wardrobe. Reserve fixed shelves for specific purposes like shoe storage.
Drawers handle smaller items that get lost on shelves. Underwear, socks, ties, and accessories belong in drawers. You can also use deep drawers for folded jeans or workout clothes. Place drawers at waist height for easy access. Lower drawers work well for heavier items you rarely move. A good rule divides your space roughly into fifty percent hanging, twenty-five percent shelving, and twenty-five percent drawers. Adjust these percentages based on your personal inventory.
Integrate Specialized Accessories for Modern Needs
Modern wardrobe design goes beyond basic rods and shelves. Specialized accessories maximize every centimeter of your built-in wardrobe. Clothes lifts bring high-mounted rods down to your level. You store seasonal items overhead, then pull them down with minimal effort. This accessory suits older users or anyone with limited mobility. It also makes full use of ceiling-height storage that might otherwise remain inaccessible.
Trouser hangers pull out smoothly and keep pants wrinkle-free. You slide the frame outward, select your trousers, and slide it back. This system prevents creases better than folding. It also displays your pants clearly so you avoid repeating outfits. Tie racks and belt racks mount inside doors or on drawer sides. These small additions keep accessories organized without consuming shelf space.
Internal drawers with dividers organize jewelry, watches, and small electronics. You can customize the compartment sizes to match your collection. Pull-out valet rods offer a temporary hanging spot for tomorrow’s outfit. You prepare your clothes the night before and hang them ready to grab. Laundry hampers built into the wardrobe keep dirty clothes out of sight until wash day.
HenLeap Home includes quality features as standard in every custom design wardrobes project. Soft-close doors and drawers prevent slamming and protect your belongings. The gentle mechanism extends the life of your hardware. Durable dovetail drawer construction provides exceptional strength at every joint. These drawers hold heavy loads without loosening over time. You open and close them thousands of times without noticing wear.
Lighting transforms your wardrobe’s usability. Strip lights under shelves illuminate dark corners. Motion-sensor lights activate when you open the door. You see every color accurately without straining your eyes. This customization adds convenience and luxury to your daily routine. Consider these accessories during your initial planning phase. Retrofitting them later costs more and requires additional labor.
Decide Between Modular and Fully Custom-Built
After you plan the internal configuration, you face one more major decision. You must choose between modular wardrobes and fully custom-built units. Each approach serves different needs. Your budget, timeline, and design expectations guide this choice. Understanding the trade-offs helps you avoid costly mistakes.
Modular Wardrobes: Flexibility and Faster Installation
Modular wardrobes consist of pre-manufactured panels and components. Manufacturers produce these parts in standard sizes. You select from available dimensions and configurations. This approach offers genuine flexibility. You can rearrange modules later or move them to a new home. The components connect with cam locks and dowels, so disassembly remains possible.
Cost represents a significant advantage. Modular systems typically cost less than fully custom options. The manufacturing process runs efficiently at scale. You pay for the components and assembly rather than bespoke craftsmanship. Lead times also stay short. Standardized parts ship quickly from warehouses. You can often complete the entire fitting within a single day or a few days with standardised components.
Design flexibility does have limits. You work within the manufacturer’s catalog. If your room has unusual proportions, standard modules may not fit perfectly. Gaps appear along walls or above the unit. You can fill these spaces with filler panels, but the result lacks the seamless integration of a custom piece. For renters or frequent movers, modular wardrobes offer practical advantages. You can take your wardrobe with you.
Fully Custom-Built: Precision Fit and Unique Design
Fully custom-built wardrobes start from a blank slate. A designer measures your space and creates a wardrobe design tailored to your exact room. Every panel, shelf, and drawer gets manufactured to your specifications. This approach delivers a precision fit that maximizes every centimeter. Floor to ceiling wardrobes become possible because the unit integrates directly with your architecture.
The timeline requires patience. A fully bespoke project typically takes 6–12 weeks from design to installation. This period includes measurement, design revisions, fabrication, and finishing. The on-site installation itself may take as little as one day. However, the preparation phase demands time. You also pay more for this level of customization. Skilled craftsmen and premium materials drive the cost upward.
The design possibilities expand dramatically. You can accommodate sloped ceilings, recessed alcoves, or awkward corners. Your built-in wardrobe becomes part of the room’s architecture rather than a freestanding object. You choose every finish, handle, and internal accessory. The result reflects your personal style precisely.
HenLeap Home makes this custom process seamless. Their team handles on-site measurement, 2D and 3D virtual designs, production, pre-assembly, packing, and delivery. You receive after-sales support throughout the process. This comprehensive service removes the stress from custom design wardrobes projects.
| Wardrobe Type | Installation Timeframe |
|---|---|
| Modular system | 1–2 days (assembly) |
| Custom-built-in | On-site installation as little as 1 day (plus design & fabrication time) |
Consider your long-term plans. If you expect to move within a few years, modular offers portability. If you plan to stay, a fully custom wardrobe adds lasting value to your home. The sliding doors on custom units operate smoothly because installers level and align everything precisely. Weigh these factors carefully before you commit.
Set a Realistic Budget and Timeline
Understand the Cost Drivers in a Custom Project
Your custom wardrobe budget depends on several key factors. Materials, size, complexity, and hardware choices all affect the final price. Understanding these drivers helps you make informed decisions without surprises.
The average cost for a custom closet project, which is a type of custom wardrobe, is $2,000–$6,000. This includes installation, materials, construction, and design.
Your actual cost depends on your specific choices. Larger wardrobes require more material and labor. Complex layouts with curved panels or custom finishes cost more than simple rectangular layouts. High-quality plywood costs more than MDF or particle board. Premium hardware like soft-close mechanisms and dovetail drawers adds to the total.
Your door style also affects the budget. Sliding doors require track systems and precise installation. Hinged doors need more clearance but often cost less in hardware. The number of drawers, shelves, and specialized accessories like clothes lifts or trouser hangers increases the price. Planning your internal layout carefully before you consult a professional prevents unnecessary additions.
HenLeap Home offers 2D and 3D virtual renderings before production begins. You see exactly how your wardrobe design will look in your space. This visualization helps you evaluate options and adjust your choices to fit your budget. You avoid expensive changes during installation.
Plan for Installation and Potential Disruption
Installation of a fully custom wardrobe typically takes one day on-site. The preparation phase, including drafting, fabrication, and finishing, takes 6–12 weeks. You need to plan for this timeline when scheduling your project.
During installation day, you should clear the room completely. Remove furniture, clothing, and other items from the work area. The installers need unobstructed access to the walls and floor. Expect some noise and dust from cutting and assembly. Arrange alternative sleeping arrangements if the wardrobe is in your bedroom.
You also need to consider delivery logistics. Confirm that the wardrobe components can fit through your doorways and hallways. Large panels may require careful maneuvering. HenLeap Home handles logistics from production to delivery, ensuring everything arrives safely.
Scheduling your timeline realistically prevents stress. Start your wardrobe project early. Allow time for revisions and approvals. A well-planned project runs smoothly from start to finish.
Review 2026 Wardrobe Design Trends and Final Checklist
You have planned your space, selected materials, and configured the interior. Now you can explore the latest trends that will keep your custom wardrobe feeling current for years. Design trends shift, but smart choices endure. You want a wardrobe that looks fresh in 2026 and remains functional through the next decade.
Explore Trending Styles, Colors, and Smart Features
Minimalist handles lead the 2026 style movement. You see push-to-open mechanisms and recessed grips replacing traditional hardware. This approach creates a seamless surface across your sliding wardrobes. The clean lines suit modern bedrooms and make cleaning easier. You simply press the door panel, and it opens silently.
Integrated lighting transforms how you use your wardrobe. Strip lights activate when you open the door. You find your clothes instantly without fumbling in darkness. Motion sensors detect your presence and illuminate the interior. This feature adds both convenience and a premium feel to your wardrobe design.
Sustainable materials gain prominence this year. Manufacturers now offer recycled core boards and low-VOC finishes. You reduce your environmental footprint without sacrificing quality. Bamboo veneers and FSC-certified plywood provide eco-friendly alternatives. These materials cost slightly more but align with responsible consumption values.
Neutral earth tones dominate color palettes. Warm greys, soft beiges, and sage greens create calming bedroom environments. You can pair these shades with natural wood textures for depth. Dark matte finishes also appear frequently, especially on floor to ceiling wardrobes. These bold choices anchor the room and create dramatic visual impact.
Smart features extend beyond lighting. You can integrate charging stations inside drawers for devices. Pull-out valet rods prepare outfits efficiently. Internal organization systems track your clothing inventory digitally. These innovations make your daily routine smoother and more enjoyable.
Finalize Your Design with a Pre-Order Checklist
Before you contact a professional, review your complete plan. A thorough wardrobe design checklist prevents costly oversights. You want every detail confirmed before production begins.
Your checklist should include:
- Accurate room measurements with ceiling height, wall length, and obstructions noted
- A complete inventory of clothing items categorized by hanging, folding, and drawer storage
- Door style selection based on available clearance and aesthetic preference
- Core material and finish choices matched to your climate and budget
- Internal configuration with hanging rods, shelves, drawers, and specialized accessories
- Hardware selections including soft-close mechanisms and handle styles
- Confirmation of lighting placement and electrical requirements
- Budget range and timeline expectations for your project
You also need to verify your customization choices align with your daily habits. Revisit your initial needs assessment. Confirm that your sliding wardrobes accommodate your longest garments. Check that frequently worn items sit at accessible heights. This final review catches errors before they become expensive problems.
Sliding mechanisms require particular attention. Verify track dimensions match your ceiling height. Confirm the sliding action clears any light switches or outlets on adjacent walls. These small details affect daily usability significantly.
When you complete this checklist, you prepare yourself for productive conversations with wardrobe professionals. You communicate your requirements clearly. You compare quotes accurately. You make decisions confidently.
Your wardrobe design journey ends with this preparation. You have transformed a vague desire into a concrete plan. The next step involves sharing your vision with experts who bring it to life.
You have now completed the full journey of selecting a custom wardrobe. The key to success is a systematic approach to wardrobe design. Start with a thorough needs assessment before you explore aesthetics. This guided method prevents costly mistakes. Use this guide as your checklist when you consult with a professional. HenLeap Home offers expert consultations and 2D/3D virtual designs to bring your vision to life. This process makes the experience seamless and enjoyable.
Remember, your wardrobe is an investment in your daily comfort and home organization. Good luck with your project. If you have any further questions, please reach out. We are here to help you create the perfect storage solution for your home.
FAQ
How accurate do my room measurements need to be?
Your measurements should be precise to the nearest centimeter. Measure at multiple points along each wall because floors and ceilings often slope. Double-check every dimension before ordering. A small error can create gaps or prevent doors from fitting properly. When in doubt, request professional on-site measurement.
What material works best for a humid climate?
Plywood stands as the superior choice for humid environments. Its cross-laminated structure resists moisture and prevents warping. MDF and particle board swell when exposed to humidity. If you live in a coastal area or a region without air conditioning, choose plywood for your custom wardrobe. This investment protects your storage for decades.
How long does a fully custom wardrobe project take?
The entire process typically spans 6 to 12 weeks. This timeline includes design revisions, fabrication, and finishing. On-site installation itself takes as little as one day. Plan your schedule accordingly. HenLeap Home provides 2D and 3D virtual designs during the planning phase, so you visualize the final result before production begins.
Can I install a custom wardrobe myself?
DIY installation works for modular systems with standard components. Fully custom-built wardrobes require professional installation. Precise leveling, track alignment, and door adjustment demand experience. Incorrect installation voids warranties and compromises functionality. HenLeap Home handles delivery and installation logistics, ensuring your wardrobe operates smoothly from day one.